
USB Digital Microscope X10
Driver for Cainda USB Digital Microscope X10
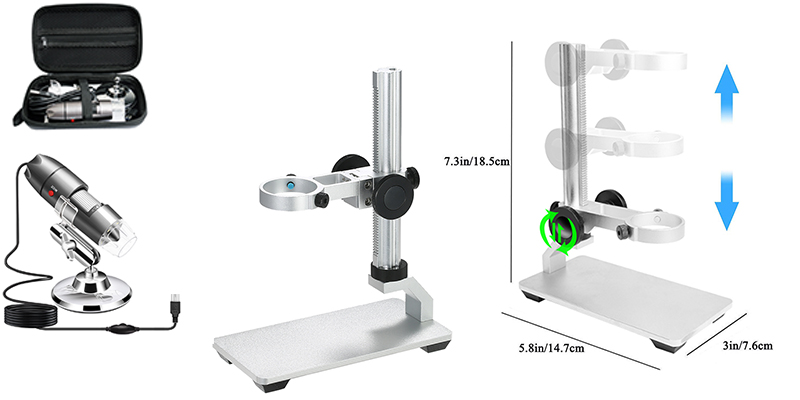
If you want to get a metal stand for your X10 microscope, please click cainda-gift@outlook.com to send an email to us.
Attach the title "I want a metal stand for X10 microscope" and your Amazon order# in the email.
(Every account can only get one)
(This promotion is only valid for Amazon orders.)
Quick Access For Driver and Operation
Windows
Mac
Chrome OS
Linux
Android
Update Driver in Windows
Common Problems Handling
Attention:
1. There is a transparent protective cover in front of the camera lens. Please remove it before use. Or you would not be able to get the clear image.
2. The microscope has the corresponding focal distance for difference magnifications. You need adjust the distance between microscope and object to change the magnification, and then adjust the focus roller to get a clear image.
3. If your microscope doesn't work on your devices normally or you have any trouble with it, please contact us via cainda-seller@outlook.com
Use in Windows
Cainda USB Microscope will automatically install default webcam (UVC) drivers when plugged into a host device. So it's compatible with any webcam app, you can choose one or more softwares below to install on your PC according to your need.
Recommend Softwares and the Features:
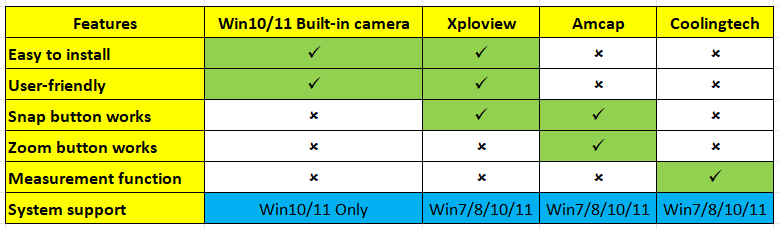
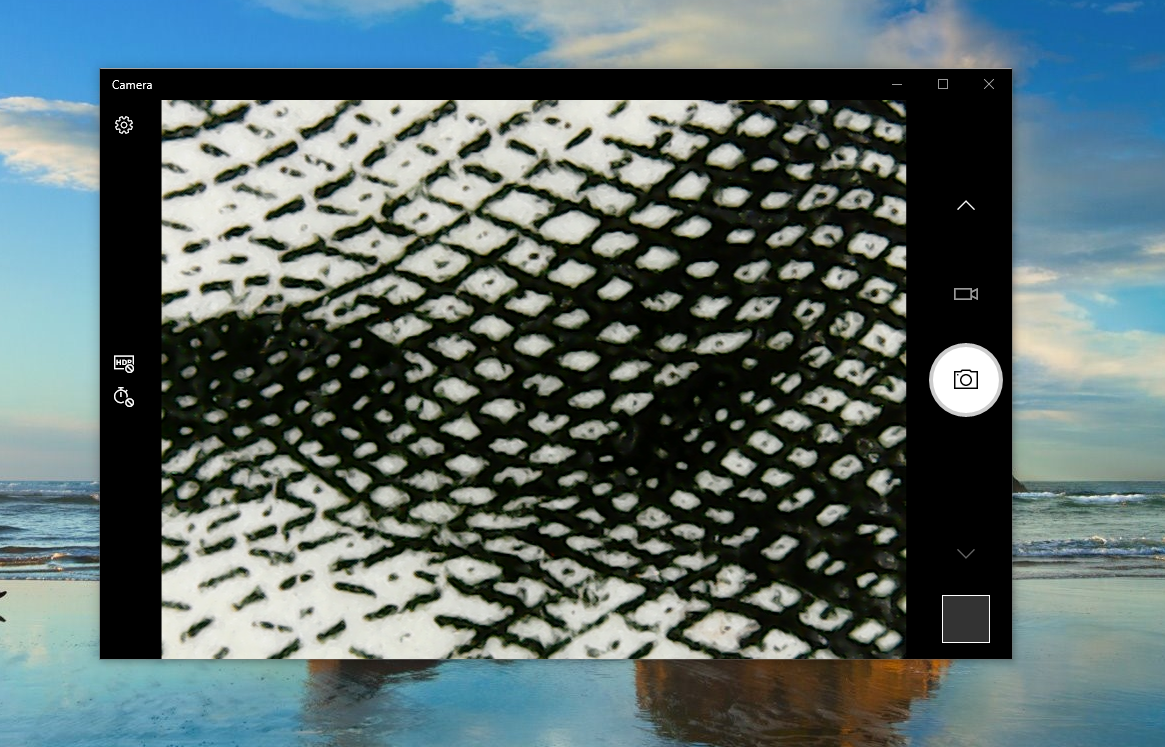
If you are a Win10/11 user, you can open its built-in camera app to use this microscope directly.
You can click the "Windows" logo on the left to find the "Camera" app.
Connect the microscope to your computer via the USB cable and then you can see the image.

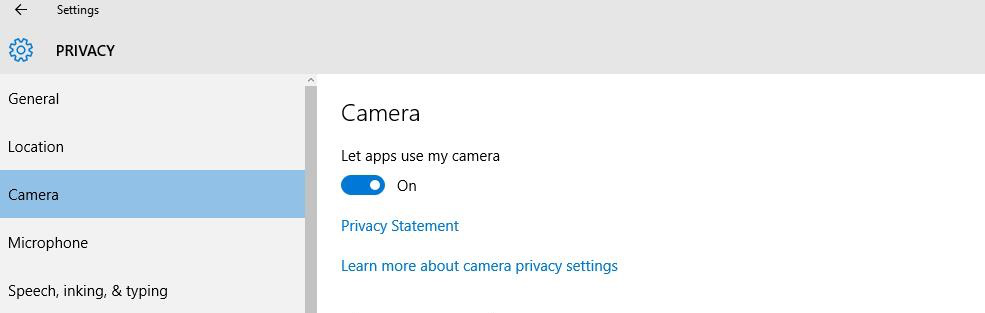
Please set up the privacy setting to let apps access the camera if can’t get the image on software.
Windows users can choose to use the "xploview" app.
Step 1: Download the "xploview"
Please download the xploview software via the link below to install:
Download Path 1:xploview.exe(3.87MB) | Windows | 32/64 bit
Download Path 2:xploview v3.3.31.exe(9.59MB) | Windows | 32/64 bit
Step 2: Install the "xploview"
Doube click the "xploview.exe" and follow the steps below:
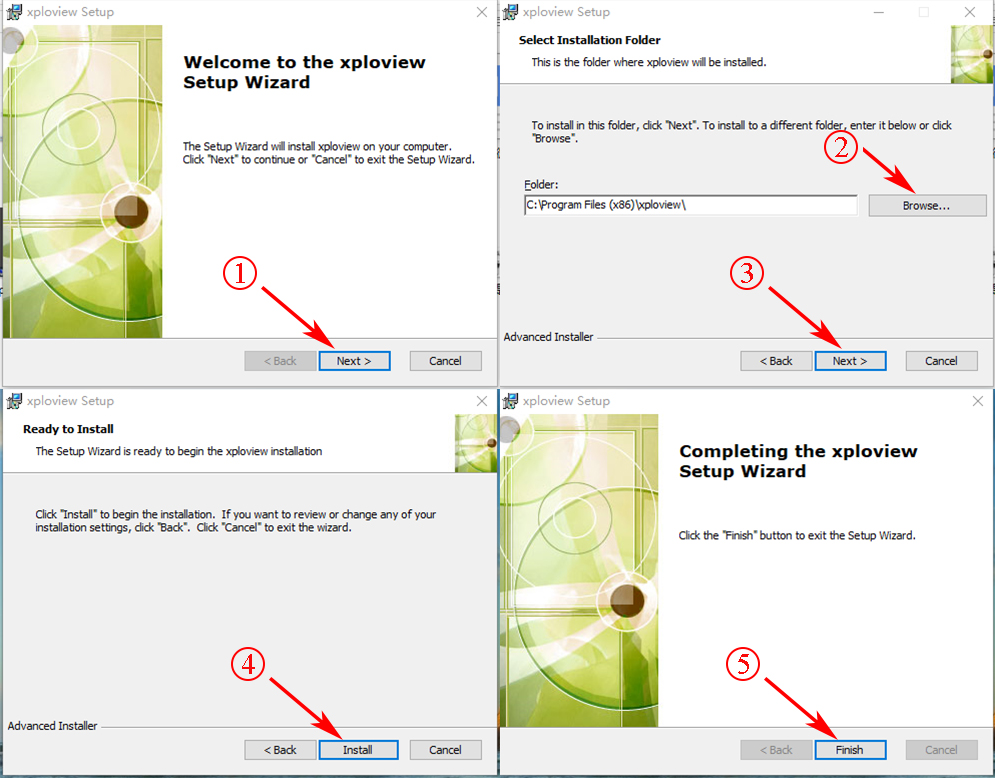
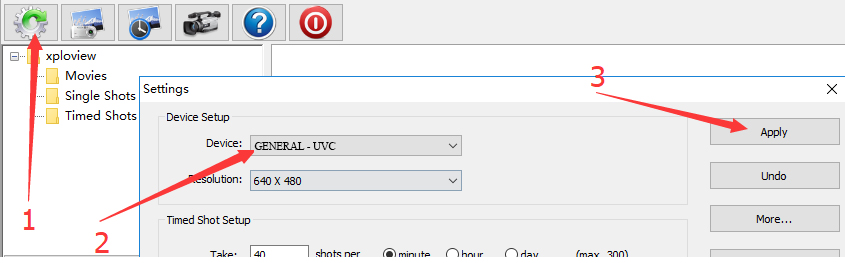
Plug the USB microscope into your computer and remove the microscope lens cover.
Run the "xploview" app and click “Settings” – “Device” to select “USB2.0 UVC PC Camera” on the dropdown list, finally click "Apply".
Note: ZOOM button doesn’t work on the "xploview" .

“Amcap” is a custom Windows software designed for the digital microscopes.
If you choose to use the "Amcap" software with your microscope, please download and install the software at first. And then connect your microscope to your PC.
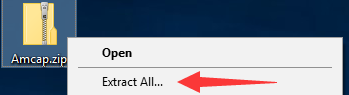
Step 1: Download the “Amcap” and extract
Please download the “Amcap” software package via this link:
Amcap.zip(3.47MB) | Windows | 32/64 bit
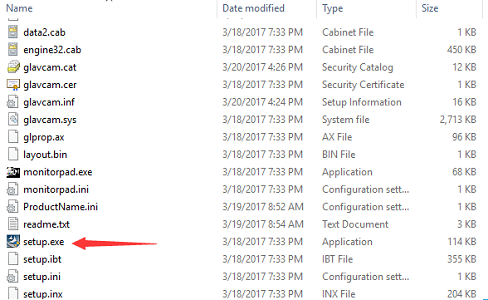
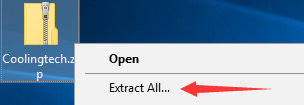
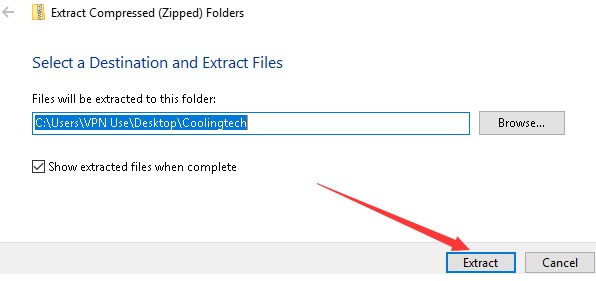
After finishing download, right-click the "Amap.zip" and select “Extract All...” to extract it out.

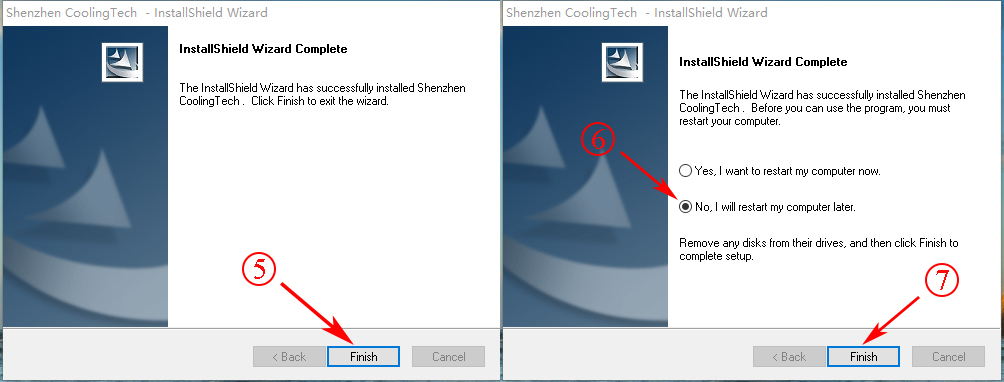
Open the "Amcap" folder and double click the “setup.exe” to install the "Amcap" app.
Please select "No, I will restart my computer later", or your computer will shut down and restart immediately.
Step 3: Use your microsocpe
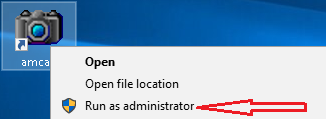
Right click the Amcap and select "Run as administrator" to open the Amcap software.
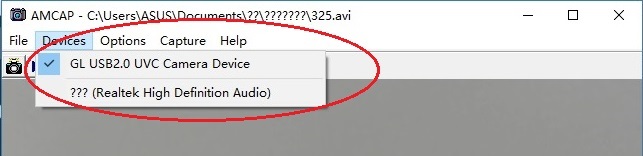
Click "Devices" on the top menu and select the "GL USB2.0 UVC Camera Device" on the dropdown list.
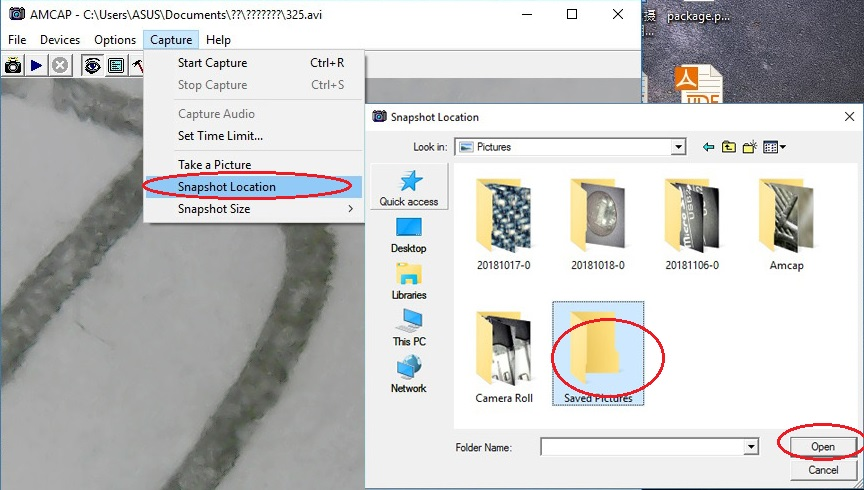
You need to set up the snapshot location for pictures on Amcap when you first use it.
Pictures: Select “Capture” – “Snapshot Location” – Find or new a folder – Click “Open”.
Videos: Click “File” – “Set Capture File” – Find and select an avi format video file – Click “Open”.
Pictures
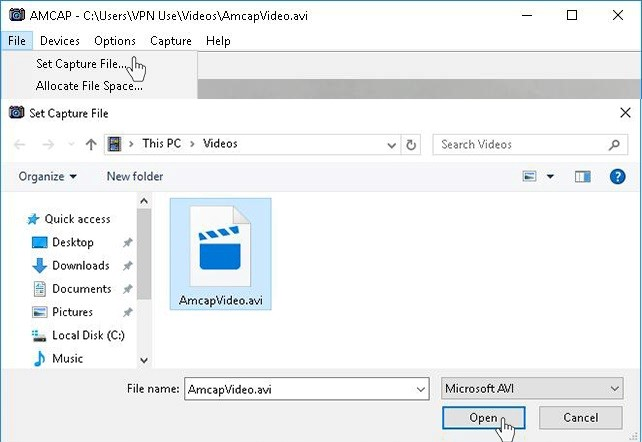
Videos
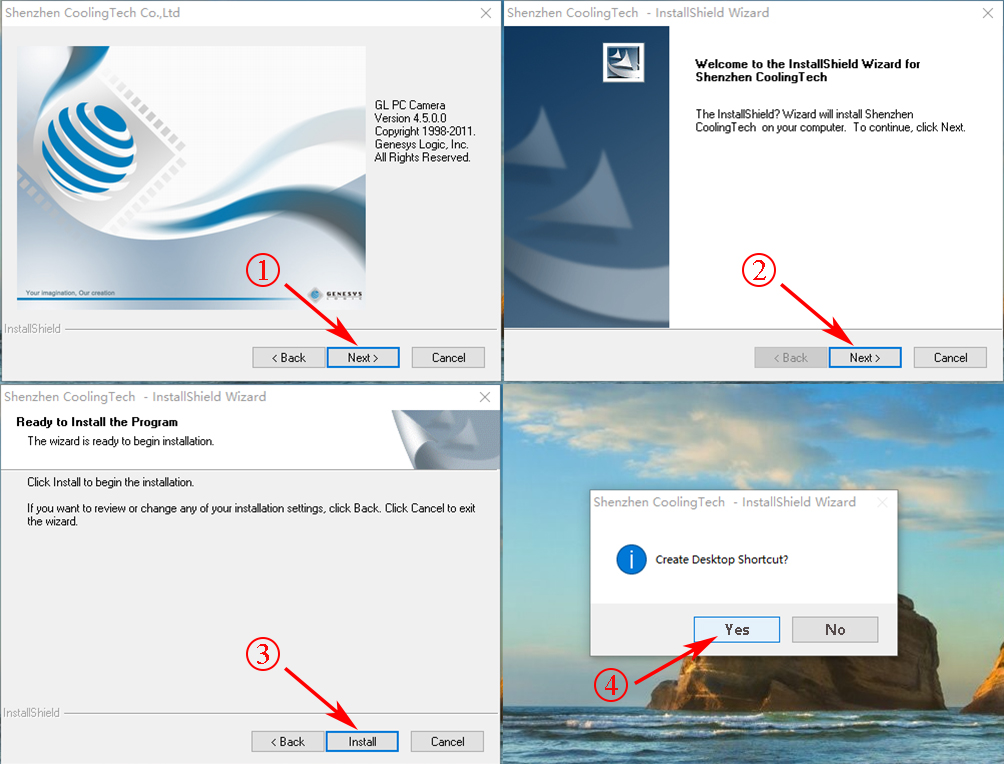
4) CoolingTechIf you need the measurement function, you can use the Coolingtech software.
Step 1: Download the “Coolingtech” and extract
Please download the “Coolingtech” software package via this link:
Coolingtech.zip(2MB) | Windows XP, Vista, 7, 8, 10 | 32 or 64 bit
After finishing download, right-click the "Coolingtech.zip" and select “Extract All...” to extract it out.
Step 2: Use your microsocpe
As it is a installation-free version, you don't need to install this software. Right click the CoolingTech.exe icon and select Properties – Compatibility – Run this program as an administrator - OK. And then you can use it.
If you still have any trouble while using it on your PC, pleases contact us via our service email: cainda-seller@outlook.com
Use in Mac
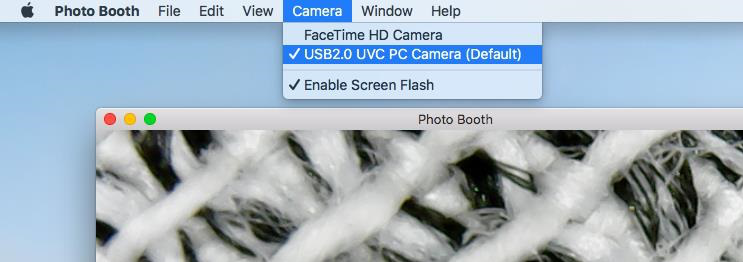
1) Photo Booth
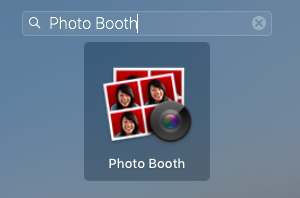
Mac user can use the "Photo Booth" to use this microscope directly.
Plug the microscope to your Mac. Click to open the "Photo Booth" software.
Click "Camera" on the top menu and select the "USB2.0 UVC PC Camera" on the dropdown list.
(Image will be revers ed on “Photo Booth”; you can use other software below if you mind.)
2) xploview
Mac user can also use the "xploview" camera app.
Step 1: Download and install the "xploview"
Please download the "xploview" via the link below to install:
Download Path 1:xploview_v3.3.310.pkg(9.73MB)
Download Path 2:xploview.dmg(10.45MB)
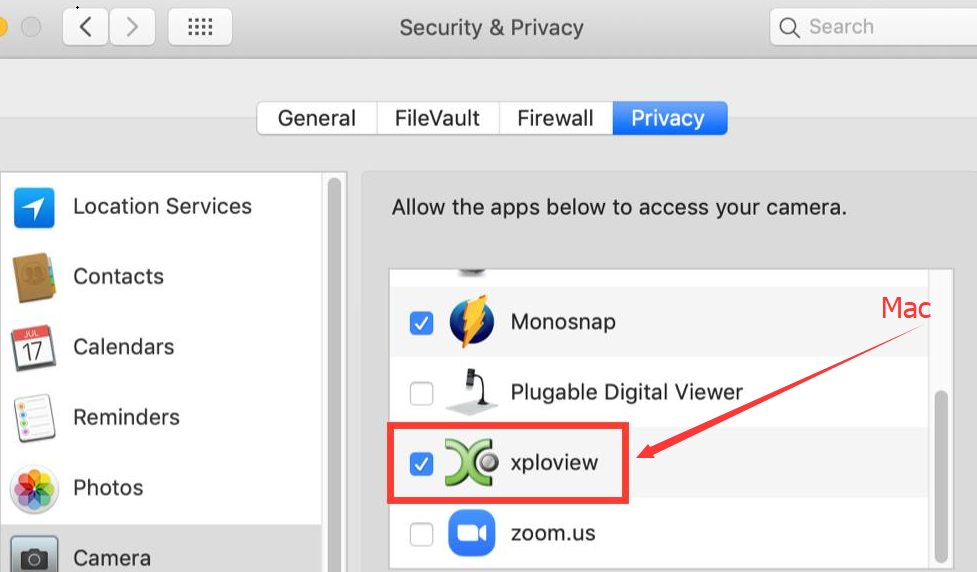
Step 2: Privacy Setting
Please allow the xploview software to access your camera. Run “Security&Privacy” - Privacy” - “Camera”
Mac user can also use the "xploview" camera app.
Step 1: Download and install the "xploview"
Please download the "xploview" via the link below to install:
Download Path 1:xploview_v3.3.310.pkg(9.73MB)
Download Path 2:xploview.dmg(10.45MB)
Step 2: Privacy Setting
Please allow the xploview software to access your camera. Run “Security&Privacy” - Privacy” - “Camera”
Step 3: Use your microscope
Plug the USB microscope into your computer and remove the microscope lens cover.
Run the "xploview" app and click “Setting” - “Device” to select “GENERAL - UVC” on the dropdown list, finally click "Apply".
Plug the USB microscope into your computer and remove the microscope lens cover.
Run the "xploview" app and click “Setting” - “Device” to select “GENERAL - UVC” on the dropdown list, finally click "Apply".
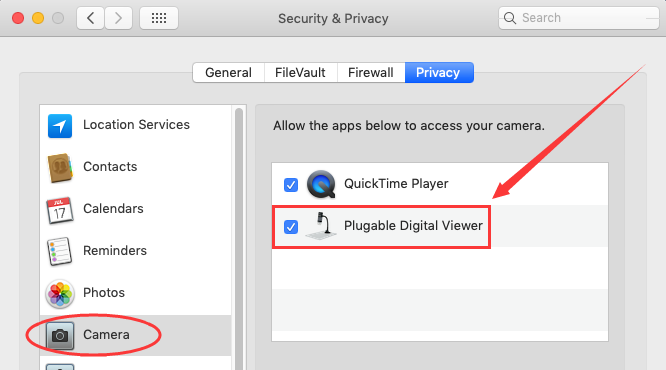
3) Digital Viewer
"Digital Viewer" App is compatible with a general-purpose Mac microscope.
The software is generated from Plugable Technologies company.
Please check your Mac version and choose the right one to install on your Mac:
Digital_Viewer_3.3.30.pkg(8.66MB) | macOS (10.13.4 and later) | 64 bit
Digital_Viewer_3.1.08.dmg(2.67MB) | Older macOS / OS X versions (10.5 and later) | 32 bit
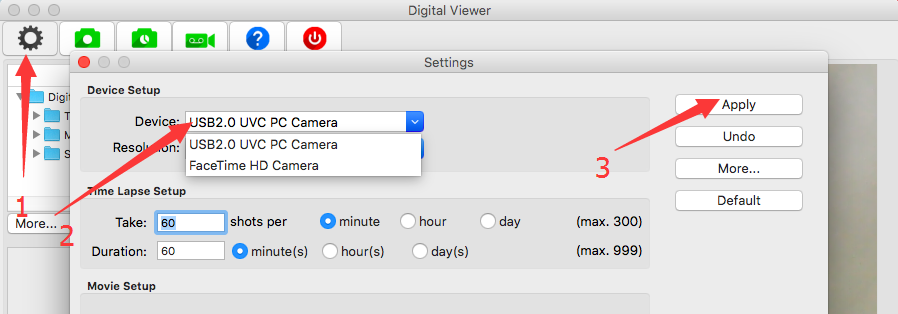
Plug the microscope into the Mac computer and run the "Digital Viewer" app.
Click “Settings” – “Device” to select “USB2.0 UVC PC Camera” on the dropdown list.
Then click "Apply" to make the microscope work.
Note: The ZOOM button doesn’t work on this software.
MacOS10.14 and above users and need to allow the "Digital Viewer" app to access camera in "System Preferences" - "Security & Privacy"
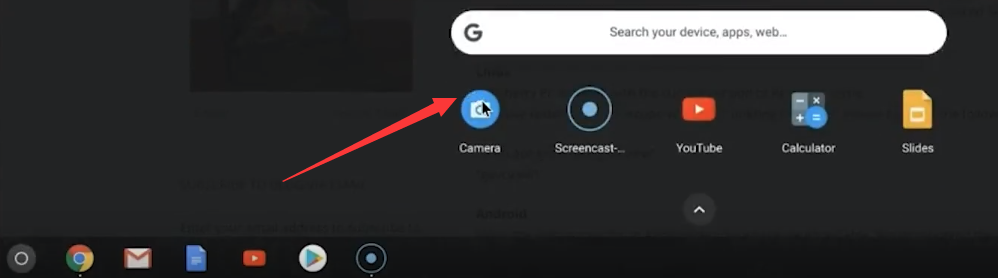
Use in Chrome OS
Cainda USB Digital microscope can be used with the default Camera app that comes with Chrome.
Go to Settings > Advanced Settings > Privacy > Content Settings > Camera, and change the device in the dropdown list to “USB Microscope”. Run the camera and your magnified object should appear on the screen.
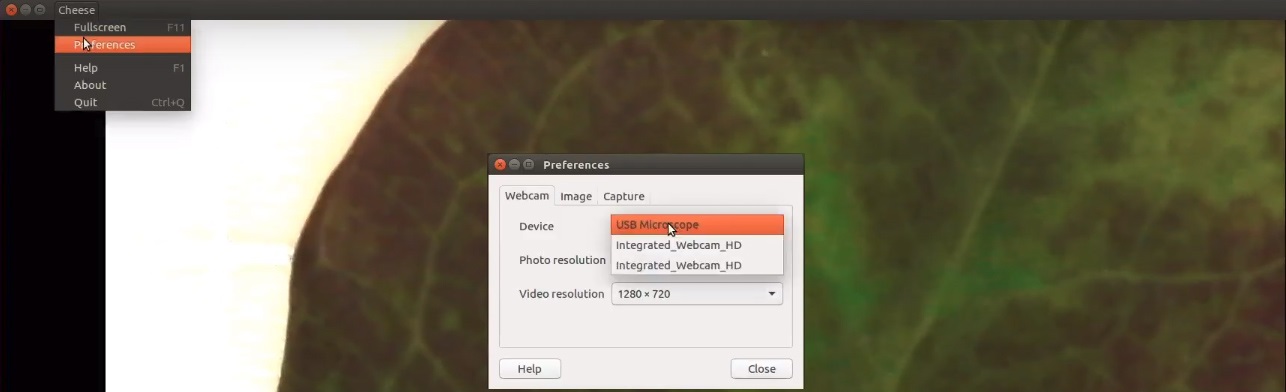
Use in Linux
On Ubuntu, search for the application "cheese" and click install. Once the installation is completed, open the application cheese. If the program displays your other camera, click on the word cheese in the top bar to access your preferences. In the webcam tab click on the dropdown menu and select USB Microscope.
Use on Android Smart Phone
Note:
1) This microscope can only work with the Android smart phone/tablet that support the otg function. It would not support the iPhone/iPad. If you need the scope that works with iPhone/iPad, please contact with us.
2) This microscope is a wired microscope. It is connected to smart devices through the USB cable connection. If you need the wireless connection with your device, please contact with us.
Step1: Download the app
Please note that Android support is on a case-by-case basis. Phone manufacturers must have support for USB Video Class devices built in or this will not work.
You can install the 3rd party camera app like “USB Camera”, "OTG View", "AN98" , "inskam" as below, to use our microscope.
Download the apk file directly:
USBCAMERA.apk(4.18MB) | Android 4.4 and above
OTG View.apk(17.52MB) | Android 4.4 and above
AN98.apk(14.01.MB) | Android 4.0 and above
inskam.apk(85.88MB) Android 4.4 and above
You can also install them from Google Play. If your phone system is the Android 10, please don't download the app via Google Play. It would not work due to system compatibility issues. The apk files above can work. Click here to read the notice of Android 10 bug.
Google Play Download Link: “USB Camera”, "OTG View", "AN98" (NO for Android 10)
Note: It may report unsafe as you don't install it from Google Play. You can choose to continue the installation or install it from Google Play.
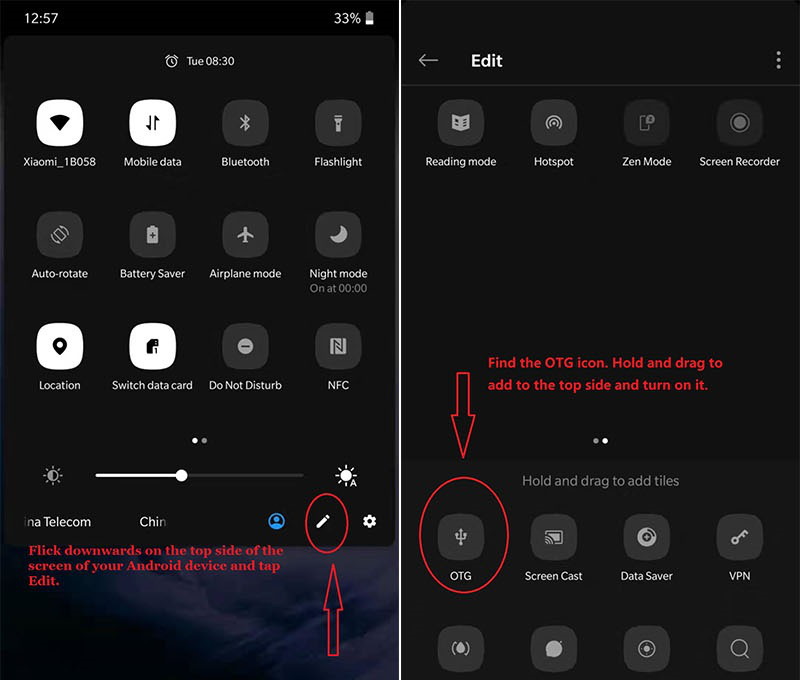
Step2: Use you microscope
Some phones may need to turn on the OTG manually by flicking downwards on the top side of the screen.
If you can't find this option on your phone, please skip it.
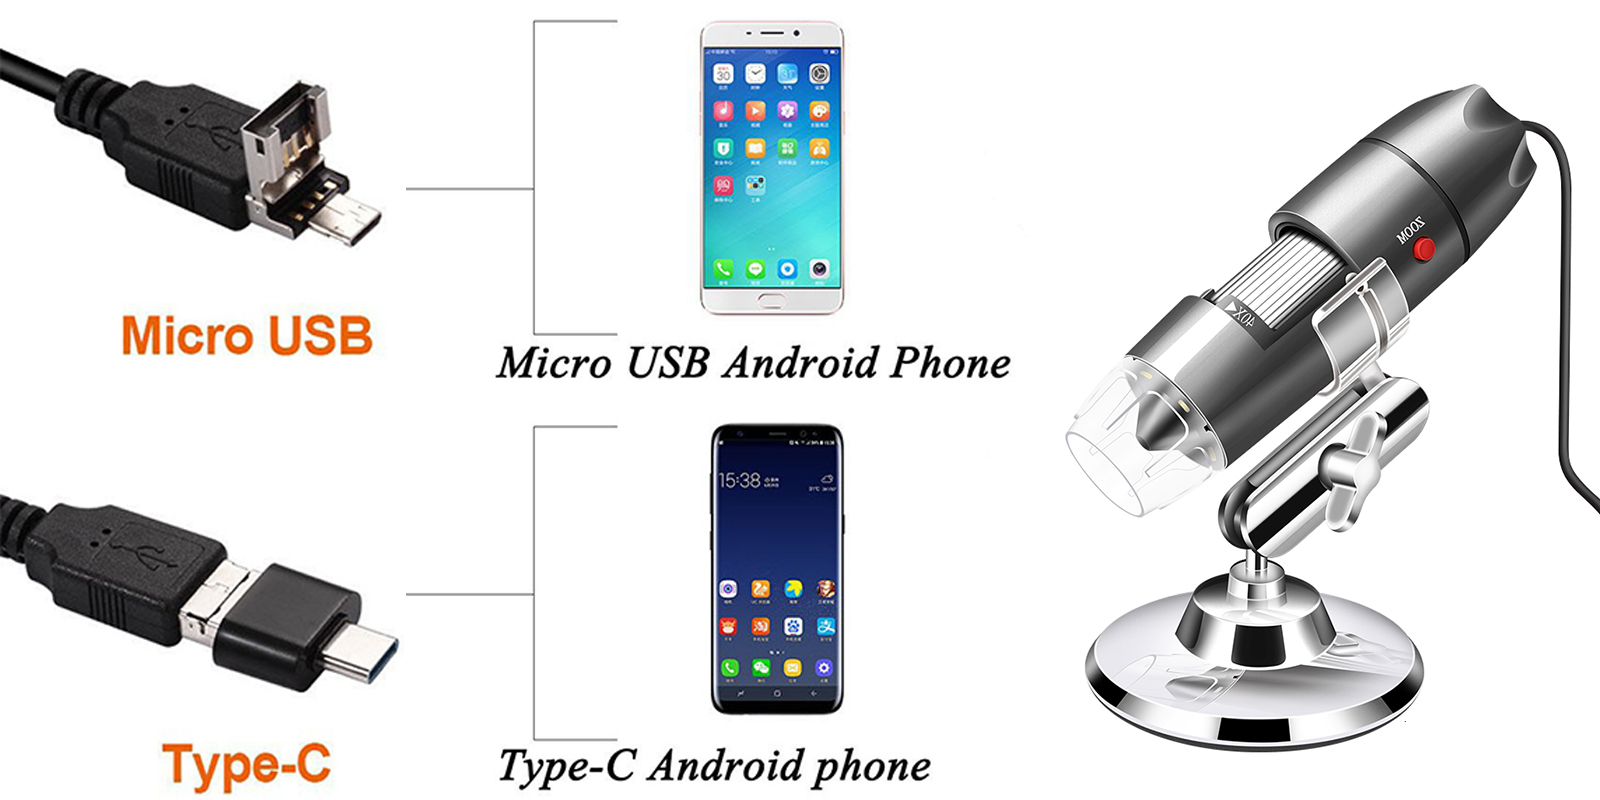
Micro USB phone users please flip a piece on the USB plug from the microscope and plug the micro usb to the phone.
Type C phone users please use the type C adapter to connect the microscope to the type C phone.
Then open the app (USB Camera/ OTG View/ AN98) to use the microscope.
If the microscope LED doesn't light up, please email to cainda-seller@outlook.com to contact us. It is the micro usb or type C connection problem. We will exchange the adapter to you.
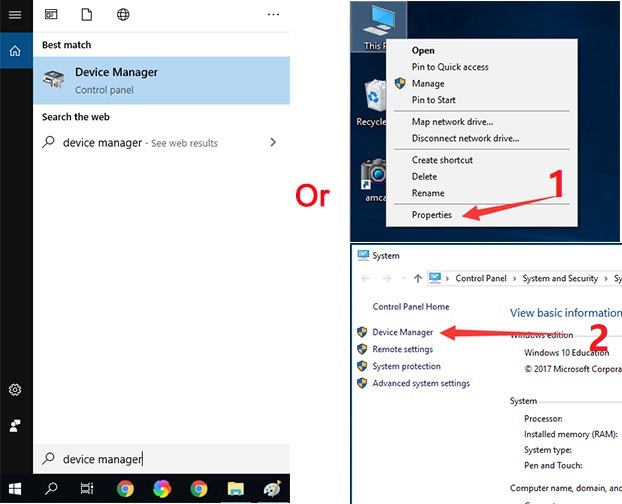
Update Driver in Windows
Open the "Device Manager" (Directly search "Device Manager" on Cortana. Or right click "This PC" and select "Properties"- "Device Manager".)
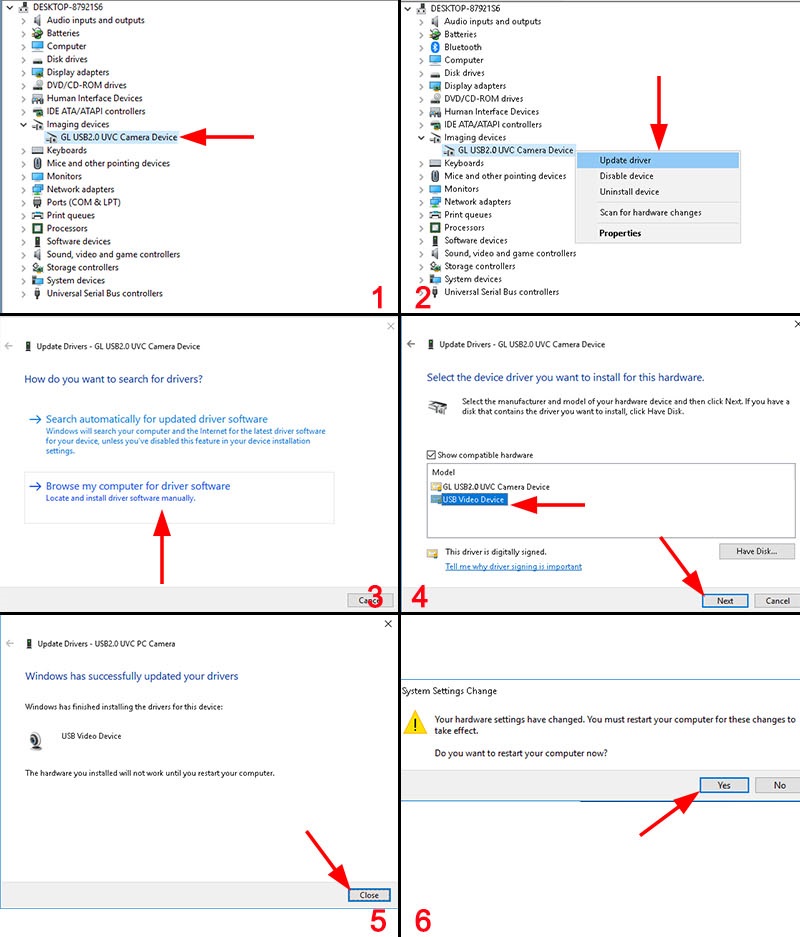
Click "Imaging Device" to show the dropdown. Right click "GL USB2.0 UVC Camera" and select " Update driver" - "Browser my computer for driver software" - "USB Video Device" - "Next" - "Close". Click "Yes" to restart the computer. Once the computer is restarted, open the Amcap and select the microscope under the "Device" to use the microscope.
1, Can’t get the clear image
There is a transparent protective cover in front of the lens of the microscope, which is used to protect the lens. The cover needs to be removed when using the scope.
For difference magnifications, the microscope has the corresponding focal distance. You need adjust the distance between microscope and object to change the magnification, and then adjust the focus roller to get a clear image.
2, Device driver error (For example, there is a yellow exclamation mark or the driver name is incorrect)
If you cannot find the device in the software and then see the driver error on the Device Manager page, please download the software and drivers through our official download link and use our recommended software.
If your PC uses the older version of the driver, it will need to manually update the driver.
3, No error reported, but the microscope does not work at all
This microscope can only work with compatible devices. It supports Windows XP/7/8/10/11, Mac OS X 10.5, Linux kernels 2.6.26 and above, Android smart phones and tablets with OTG function (How to check OTG? You can ownload the free app"USB OTG Checker" to check it).
This microscope doesn't work with iPhone/iPad and the Android devices without OTG. If you want to use these devices, please contact our customer service for recommendation or replace it with a suitable microscope.
P.S.1. If you still have any problem about your microscope, please contact us via cainda-seller@outlook.com
2. If you are satisfied with our microscope, you can click here to become our registered member. We will share the impotant update about the microscope to you at the first time.
3. If you are our Amazon customer and have interest to be one of our product testers, you can contact us. We could offer you a free product.